Dockerize Google CodeLabs
My struggles with personal projects has been that I forget how they work, how to set them up and how to use them. So once I stumbled across Google codelabs I immediately knew that I need it! Thus I went about to clone the repository, install dependencies and figure out how to compile codelabs… and then I wanted to set it up on a raspberry…
The Problem
I’m a fan of docker: no matter on which machine I work on, it just runs. Googling for existing solutions did not yield promising results for my problem:
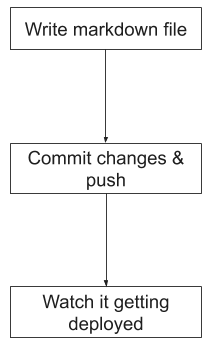
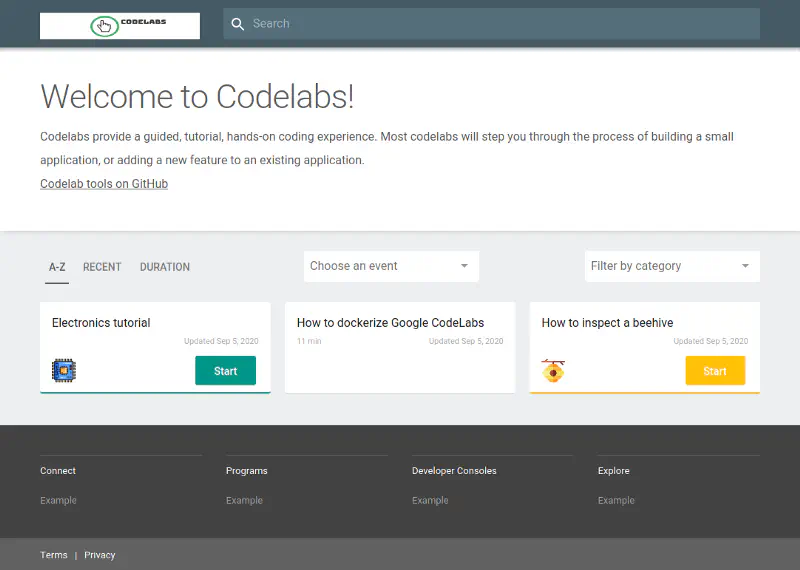
The process of creating a codelab and deploying it to the web should only require my favorite text editor and git (and maybe ssh-ing into a server and executing a single command). Google codelabs are written in either markdown or google docs and are compiled with claat. It converts them into HTML for the codelabs web application. The final result is a static web page:
Project Setup
Google codelabs is open-source and customizable (define colors of categories, and much more). For that purpose I forked the repository and created my own branch. This also makes it possible to easily consume updates. Then I created a private repository which contains the codelabs and Dockerfile.
The folder structure of the private repository looks like this:
codelabs/
├── example1/
│   ├── assets/
│   │   └── image1.png
│   └── codelab1.md
├── example2/
│   ├── assets/
│   │   └── image2.png
│   └── codelab2.md
└── Dockerfile
The Dockerfile
Inspecting the Dockerfile gives following multi-staged build process:
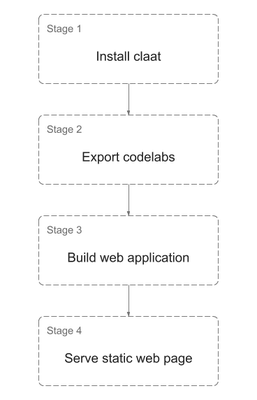
Stage 1 – Install claat
The build-tool used by the web application is gulp.js. It already includes a task to export codelabs, but I had troubles getting it to work. Therefore the first stage downloads a binary file of claat and the second stage takes care of exporting.
FROM golang:1.15.1-buster as ClaatSetup
RUN CGO_ENABLED=0 go get github.com/googlecodelabs/tools/claat
Check out the claat repository for other installation methods.
Stage 2 – Exporting codelabs
This stage is responsible for converting the markdown files into HTML. It reads all markdown files from the docs folder of the host system and stores the result in the container’s output directory. It took quite some time to figure out that claat also accepts glob patterns!
FROM alpine:3.10 as ClaatExporter
WORKDIR /app
COPY --from=ClaatSetup /go/bin/claat /claat
COPY docs/ input/
RUN /claat export -o output input/**/*.md
Stage 3 – Compiling the web app
The web application is a static page and uses the codelabs folder to generate categories, filters, links and so on. The theming can be customized in the forked repository that was mentioned at the beginning. Please replace it with your own or use the original.
FROM alpine:3.10 as AppCompiler
RUN apk add --update git nodejs npm make python gcc g++ && \
    npm install -g gulp-cli
WORKDIR /app
RUN git clone -b customization https://github.com/peterpf/tools.git codelabs-tools
WORKDIR /app/codelabs-tools/site
# Install dependencies
RUN npm install && npm install gulp
# Copy exported codelabs from previous stage
COPY --from=ClaatExporter /app/output codelabs/
# Build everything
RUN gulp dist --codelabs-dir=codelabs
# Replace symlink in with actual content (see below for description)
WORKDIR /app/codelabs-tools/site/dist
RUN rm codelabs
COPY --from=ClaatExporter /app/output codelabs/
An interesting discovery I made is that the generated dist/codelabs directory was a symlink! This was troublesome because in the next stage the whole dist gets copied and we miss out on our exported codelab files. To fix this, the symlink is replaced with the actual codelabs from Stage 2.
Stage 4 – The final boss
You can pick any static file hosting server that you like. The only thing needed is the dist directory from the previous stage:
FROM caddy:alpine as Deployment
WORKDIR /app
COPY --from=AppCompiler /app/codelabs-tools/site/dist/ .
EXPOSE 80
CMD ["caddy", "file-server"]
At this point you should be able to build a docker image and access your own custom codelabs running at http://localhost:8080 with
docker build . -t codelabs
docker container run -p 8080:80 codelabs
Deployment with docker-compose
Check out the docker-compose template. Start or stop the container with:
docker-compose up --build codelabs
docker-compose down codelabs
If something changed in home-automation/codelabs, then the build needs to be triggered from the beginning because the git clone needs to be done again.
Creating the docker container
In order for changes to take effect (articles, categories, …) the docker image needs to be built again. This is because CodeLabs is a static website and only scans the articles during compilation.
Build the docker image with:
docker build . -t codelabs
And run it with:
docker container run -p 8080:80 codelabs
CodeLabs should now be available on localhost at port 8080.
Try it out and visit http://localhost:8080.
Resumé
Again, I was fascinated by the power of docker. This piece of code can now be used with a CI/CD pipeline to ship codelabs out-of-the-box. For me it was a great experience working with multi-staged docker builds. Hope this will help other people!
Add a codelab
Create a folder for the tutorials, let’s call it docs.
Inside this folder create another one called assets. This one will contain all images that are needed in the tutorials.
Create a new markdown document in the docs folder. This will be the document for writing the article.
The folder structure should look like this now:
docs
│
└───assets
│   │   picture01.jpg
│   │   picture02.jpg
│   │   ...
│
└───category01
│   │   my_first_article.md
│   │   ...
└───category02
│   │   my_second_article.md
│   │   ...
Follow the official formatting guidelines here.
If images need to be present, add them to the assets directory.
After you finished writing the article, generate the page by executing the claat command in the docs folder:
claat export my-article.md
That’s it! A new folder should now be available in the working directory. CodeLabs needs to be compiled again in order for the new article to show up.
Commit the changes to the home-automation repository.
Add a new view
Copy-paste any view from views and rename it accordingly.
Also adapt the view.json which contains metadata information about the category.
In order for articles to show up in this view, simply add the name to the tags attribute in the file:
summary: Some summary of a tutorial
id: a-unique-id
tags: MyViewTag
status: Published
authors: John Doe
Add a new category
Documents can be tagged with in the document header:
summary: Some summary of a tutorial
id: a-unique-id
categories: MyCategory
status: Published
authors: John Doe
Peter W. Egger
Software Engineer / Data Scientist
Maker culture enthusiast and aspiring data scientist.